Installing fonts in MS word is not a complicated task. Once you have installed them in Windows, it will take a little time to get it done on Ms word too. Let’s learn today about how to install them so that you can easily use them whenever needed.
While using MS word you might have get your hands on different fonts incorporating Avenir, Ariel, Calibri and many more. Those who haven’t installed it yet let’s solve their confusion and discuss the steps for better comprehension.
How to Install Font in Microsoft Office Word?
Download the textual style documents. These frequently come packed in .zip icons. In one .zip figure, you may discover a few minor differences from a similar text style; for example, some are light weight while a few are heavy. In our case, we are going to install the Avenir next font.
This is how you will be downloading a font from boldfonts.
If you found the zipped font files, first unzip them by simply extracting it by clicking on the right click zip folder. It will unzip the folder, and you can easily get any of them.
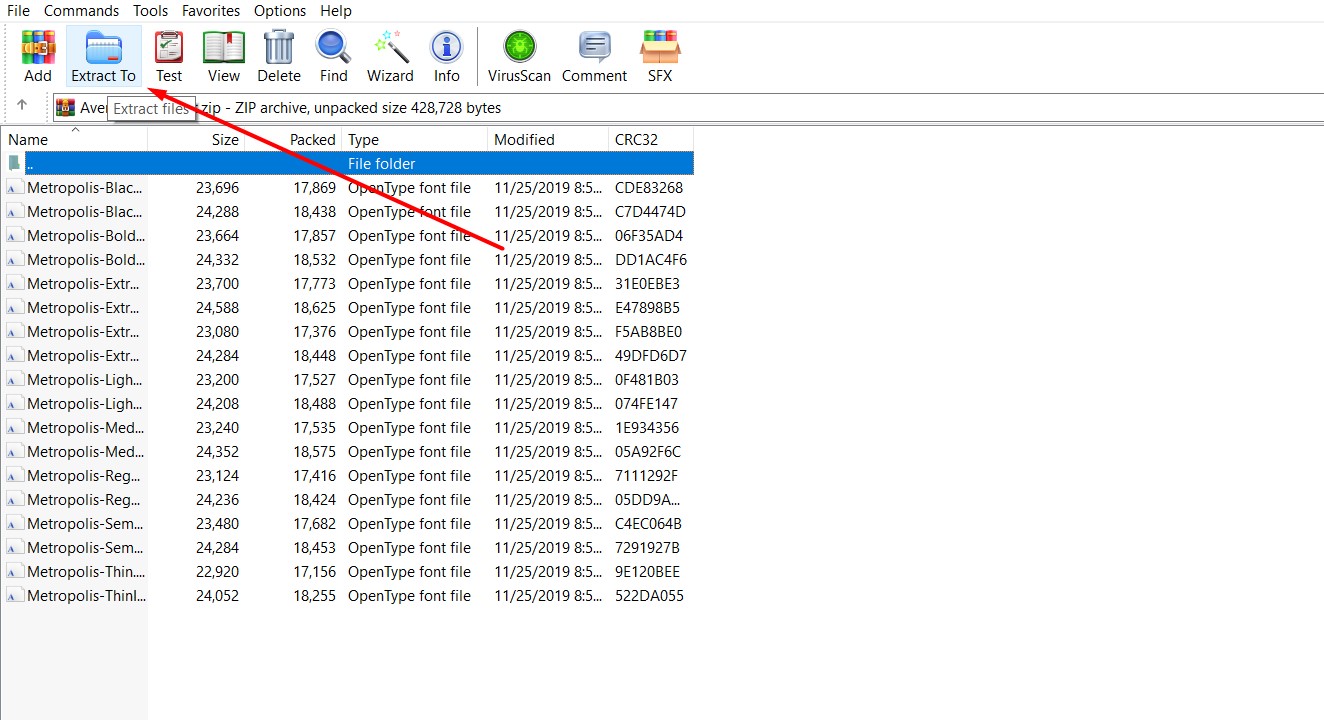
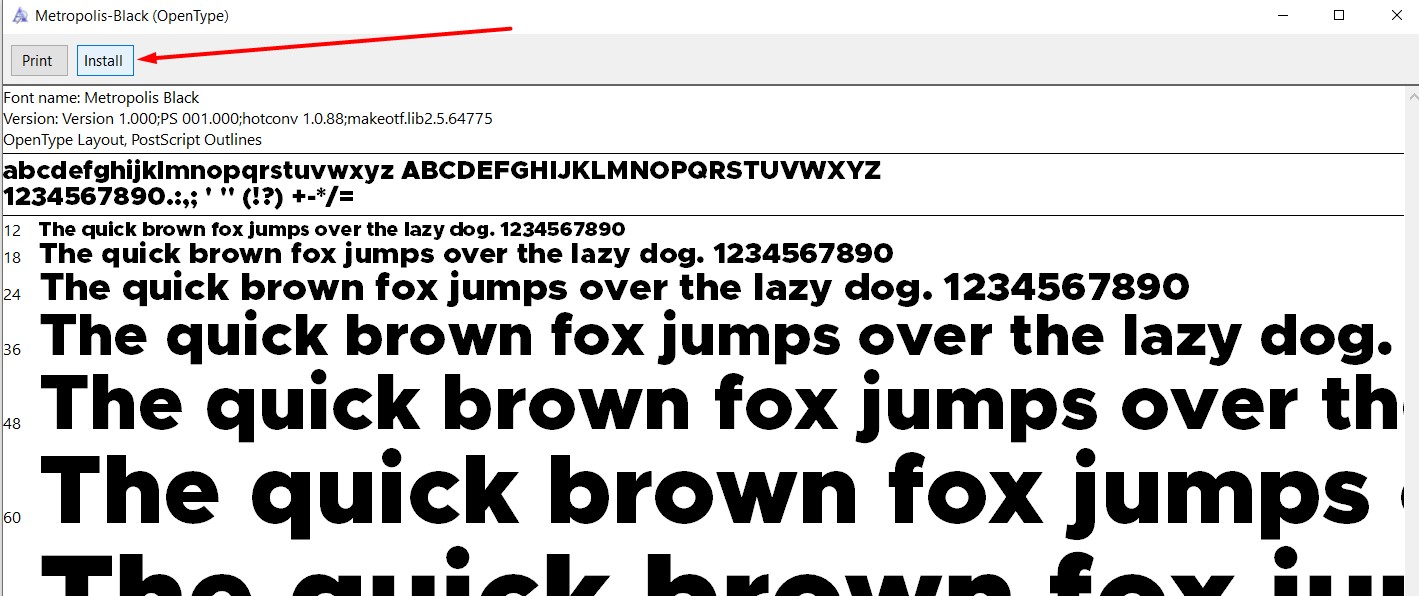
A list of fonts will appear on your screen—Right-click on that font that you need and press the install option.
If you get the notification of ‘Allow changes to your computer,’ click on yes if you think that a particular font is trustworthy. Later your newly installed fonts will appear in Word file.
2nd Method
If this method is not appropriate for you, let’s proceed to another level that is as easy as the previous one. All textual styles are put away in the C:\Windows\Fonts folder. Likewise, you can include textual styles by just hauling font files from the removed documents organizer into this folder. Windows will naturally add them.
On the off chance that you need to perceive how your selected font will like alike, open the Fonts organizer, right-click the textual style document, and afterward click Preview. You will get an idea of how people will perceive it.
3rd Method of Installing MS Word
If this method is not applicable to you, let’s get going with another technique that you might want to get your hands on.
If you want to check whether your fonts are installed or not, you can check them from the Control Panel list. In case you are using Windows 7 or Windows 10, simply go to the Control panel and later proceed to Fonts option.
On the other hand if you are using Windows 8.1, go to Control panel and later click Appearance and personalization and go for Fonts. It is how you will get an idea either the fonts are correctly managed and installed or needs some change.

The next time you use the fonts, you can get your hands on the newly installed fonts without any issue. These are the easiest ways to Install Font in Ms. Word. There are some other ways too with which you can install them as it is entirely up to you.
Note: If you are looking to install font in Windows or want to install bulk font in mac then checkout our detailed guides.
Conclusions
I hope you will find this article informative and useful. If you are already facing issues in this regard, this article will help you in installing quickly.